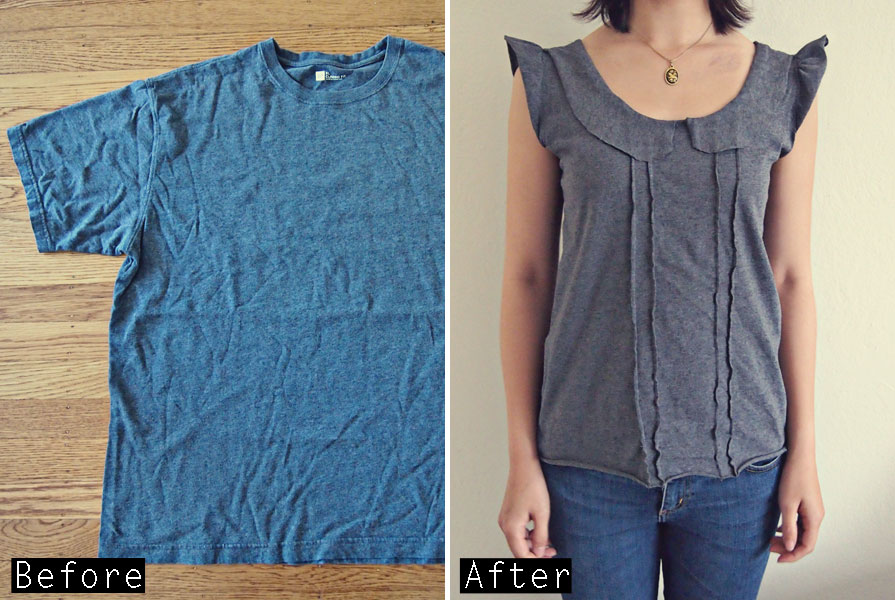
I’ve just rediscovered what a great fabric jersey is when it comes to reconstructing garments. It’s stretchy, doesn’t fray and is easy to cut, making this t-shirt DIY an absolute breeze! I think adding the pin tucks on the front makes the top look more premium.
ニット生地はリメイクが簡単にできていいですよね。ピンタックを入れるといい感じになりました。
Step 1
Use a tank top you own as a guide to trim the arm hole and side seam. Fold shirt lengthways to cut out the neckline.
手持ちのタンクトップをなぞって脇を切ります。縦におってからネックラインを切ります。

Step 2
Fold and stitch the pin tucks on the front. Trace the front neckline and draw a Peter Pan collar. Add 1cm seam allowance and cut two collars.
ピンタックを作ります。前のネックラインにそって衿の型紙を作ります。1cmの縫い代を付けてから衿を二枚切る。

Step 3
Attach collar to the wrong side and trim along the curve. Fold down the seam allowance at the shoulder seam. Fold collar down on to right side and hand stitch in place.
裏に衿を付ける。カーブは切り込みを入れる。肩の縫い代を折ってから衿を表に倒す。手縫いで付ける。

Step 4
Trace along the arm hole curve to make a paper pattern. Add 6cm for ruffles and cut two strips of fabric using the paper pattern. Gather along the straight edge and attach on to arm hole.
袖ぐりにそって型紙を作る。6cmギャザー用に長くしてから2枚切る。ギャザーを入れて袖ぐりに縫う。

Step 5
Stitch the side seams. Finished!
脇を縫ってでき上がり。


3 comments
So Clever!
This is super cute! I’ll be filing this idea away for future use!
Fabulous idea!
thanks for sharing.